The “Journey forms” page keeps the vehicles’ journey forms: which driver drove which vehicle and when, and what was done during the drive (work, a regular trip or a charter trip). It is the home page of the transport module. A driver sees his or her journey forms in the mobile app and enters the odometer readings there.
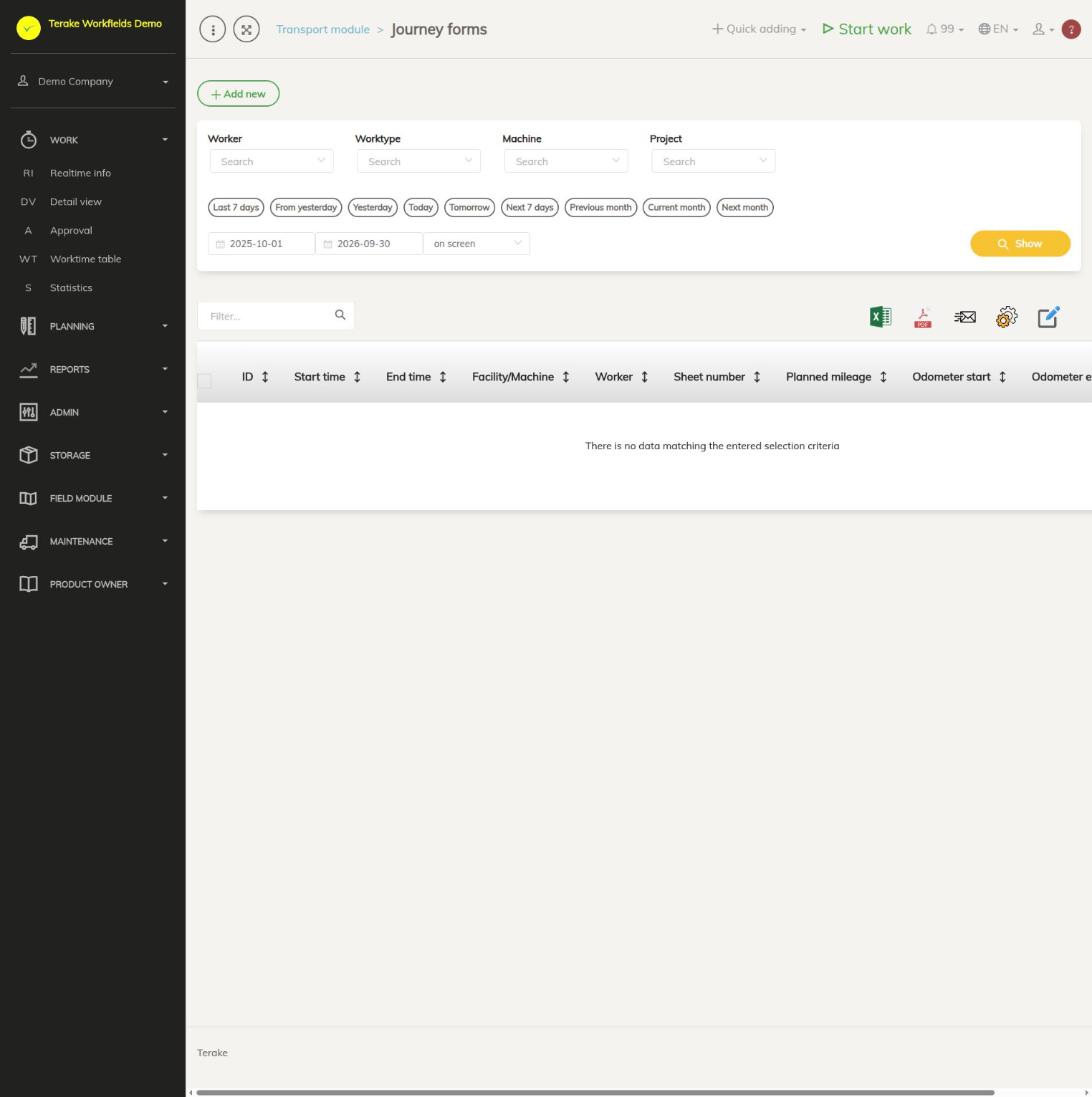
Page layout
- The button “Add new” and the period selection (quick choices or a start and end date), then “Show”. The list shows the journey forms that start and end within the selected period.
- Table columns: “ID”, “Start time”, “End time”, “Facility/Machine”, “Worker”, “Sheet number”, “Planned mileage”, “Odometer start”, “Odometer end” and “Actions”.
- “Start time” and “End time” are calculated from the journey form’s rows (the start of the earliest row and the end of the latest row), “Planned mileage” is the sum of the rows’ mileage. The odometer readings come from the driver’s mobile app.
- The “Actions” column has a pencil button (open and edit) and a bin button (delete).
How to create a journey form
- Press “Add new”.
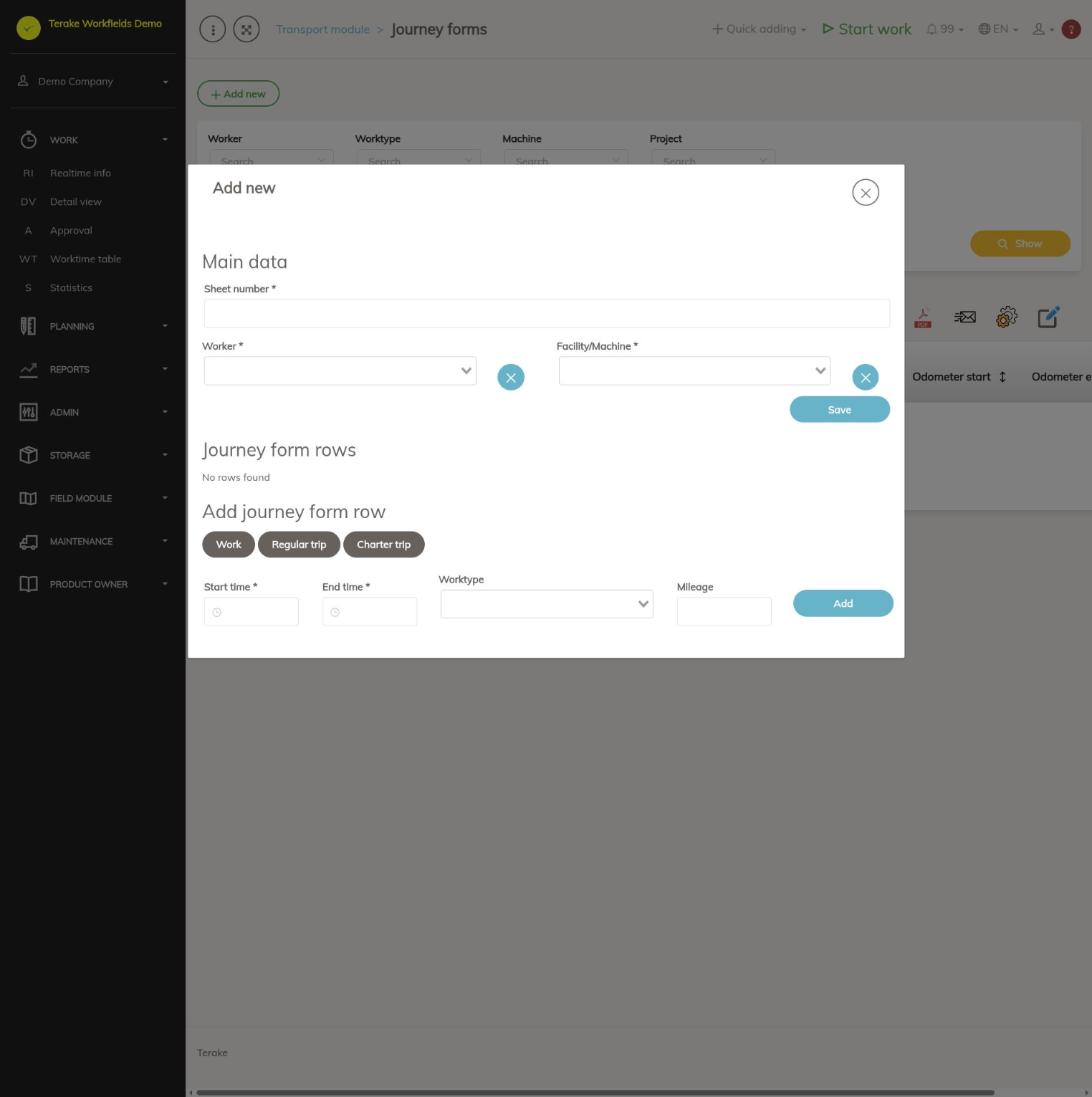
- In the section “Main data”, enter the “Sheet number” and select the “Worker” (driver) and “Facility/Machine” (vehicle). All three are required.
- Press “Save”.
The start and end of a new journey form are at first today from 8.00 to 17.00. They change when you add rows.
How to add rows to a journey form
Rows can be added only to a saved journey form. Open the journey form from the list with the pencil button.
- In the section “Add journey form row”, select the row type: “Work”, “Regular trip” or “Charter trip”.
- Enter “Start time” and “End time” (required; the end cannot be before the start).
- If needed, select the “Worktype”.
- Fill in the field that depends on the type:
- Work: enter the “Mileage” in kilometres.
- Regular trip: select the “Trip route”. The route length is taken as the row’s mileage.
- Charter trip: select the “Charter job”. Only charter jobs that are not yet on any journey form row are offered.
- Press “Add”.
The added rows are in the section “Journey form rows” with the columns “Time”, “Mileage”, “Worktype”, “Trip route” and “Charter job”; a charter job also shows its origin, destination, route and additional information. Remove a wrong row with the “Delete” button. After each addition and deletion the journey form’s start, end and planned mileage are calculated again.
How to change or delete a journey form
- Open the journey form with the pencil button.
- Change the “Sheet number”, “Worker” or “Facility/Machine” and press “Save”. To change a row, delete the wrong row and add a new one.
- To delete the journey form, press the row’s bin button in the list.
Who can see and change it
The transport module is shown to a passenger transport company, and there only to the role “Administrator”, who can create, change and delete journey forms. In the mobile app a driver sees his or her own journey forms and the faults of the vehicles on them.
Tips
- Add the routes and charter jobs first on the pages Routes and Charter jobs.
- If you do not see a journey form in the list, check the period: the journey form must both start and end within the selected period.
- If there are no routes or charter jobs to choose from when adding a row, press the button of that type again; the choices are loaded when the button is pressed.
- Vehicle faults are on the page Faults and problems.
API calls on this page
For integrations and AI assistants: this page uses the following Terake API calls. The full description is in the API reference.
When the page opens:
GET /api/journey_forms– JourneyForm collection
Adding, changing and deleting (from the API description):
DELETE /api/journey_forms/{id}– Delete JourneyFormDELETE /api/journey_forms/{id}/deleteitem– Delete JourneyForm itemPOST /api/journey_forms– Create JourneyFormPOST /api/journey_forms/{id}/additem– Add JourneyForm itemPUT /api/journey_forms/{id}– Modify JourneyForm
Other calls from this screen’s dialogs and actions (from the web client’s code):
GET /api/journey_forms/{id}– Get JourneyFormGET /api/journey_forms/{id}/classificator/charter_jobs– Charter jobs for a JourneyFormGET /api/journey_forms/{id}/items– JourneyForm items