On the “Departments” page you describe the company’s structure: larger divisions and the departments under them. Workers, machines, workobjects, customers, projects and shifts are linked to a division, and options, planning and reports can be limited by division. The page is used by the administrator. The list, loading from a file, archiving and “Bulk edit parameters” are described in general on the Admin Settings page.
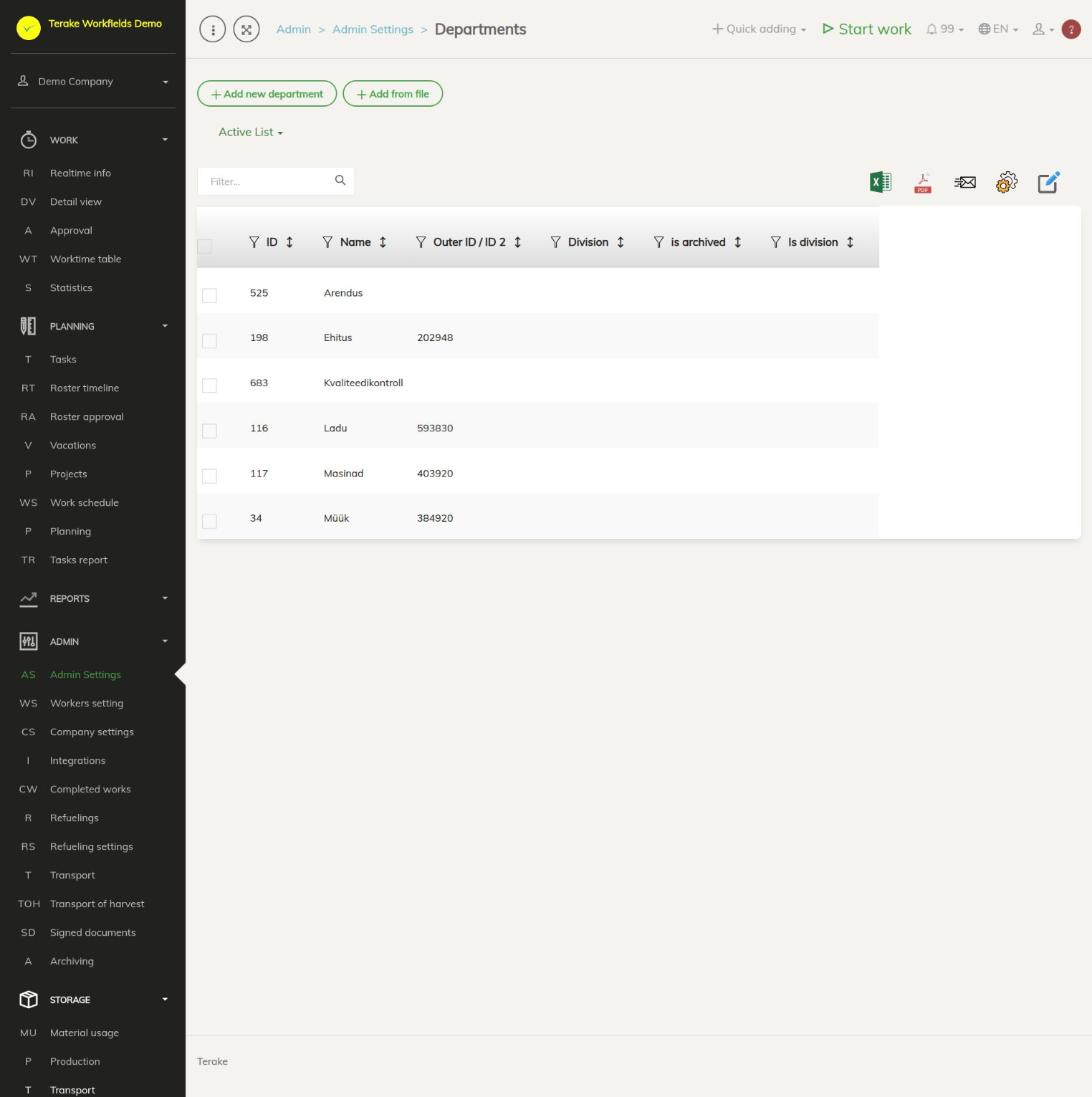
Page layout
- The “Add new department” and “Add from file” buttons and the “Active list” / “Archived list” drop-down.
- Table columns: “ID”, “Name”, “Outer ID / ID 2”, “Division” (the higher division the department belongs to), “Archived” and “Is division”.
- Clicking a row opens the “Edit department” window. The bin button on the row deletes the record.
- “Bulk edit parameters” lets you archive or delete the selected rows.
How to add or change a division or department
- Press “Add new department” or click the row of an existing record.
- On the “Main data” tab, enter the “Name” (mandatory) and, if needed, the “Outer ID / ID 2”, for example the accounting code.
- If this is a top-level division, tick “Is division”. The “Division” field then stays empty and locked.
- For a department, select in the “Division” field which division it belongs to. The options are the records ticked “Is division”. With the plus button you can add a new division right here.
- Press “Save” (the window stays open) or “Save and close”.
- To link worktypes, open the “Worktypes” tab (see below).
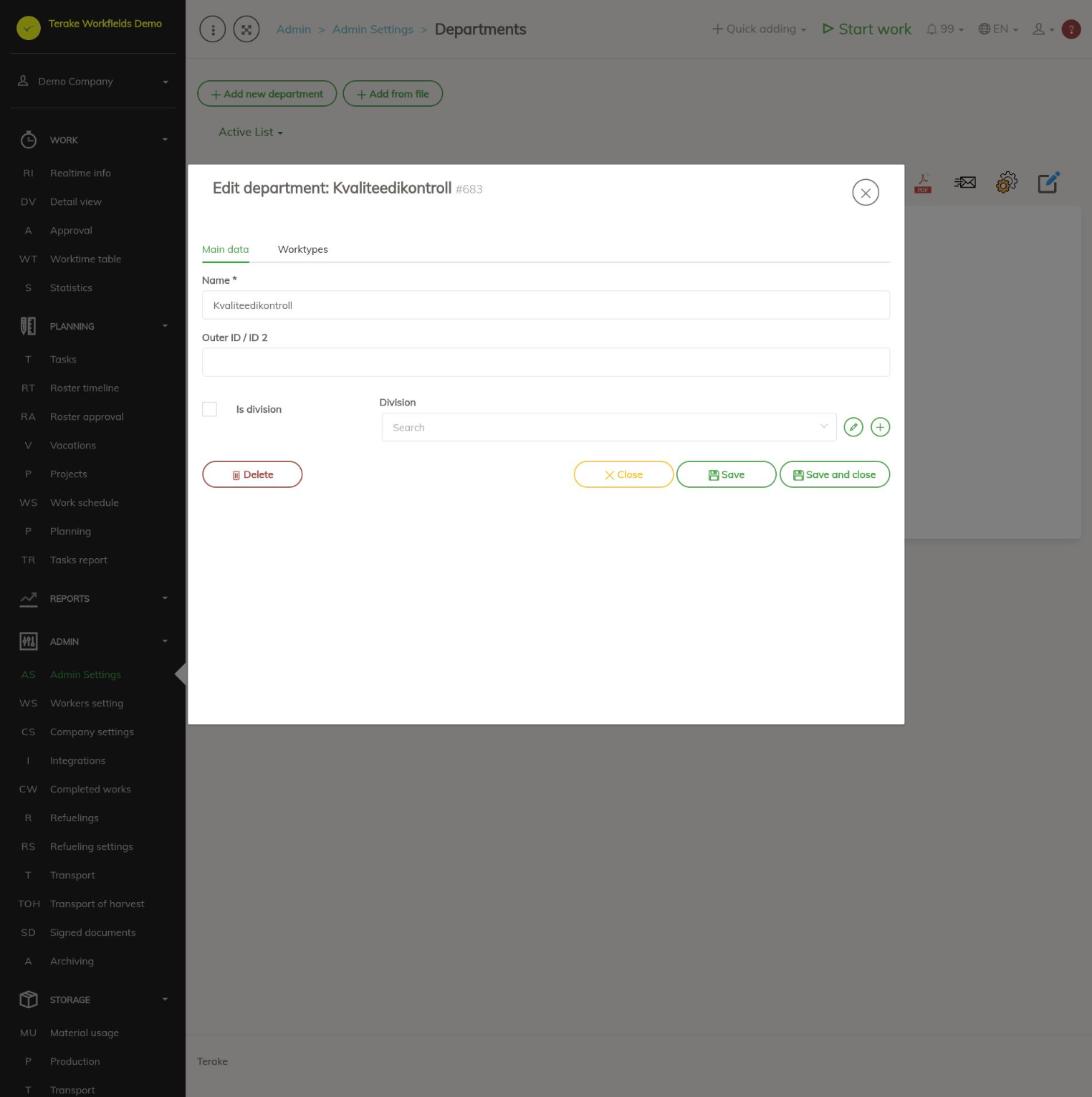
Fields:
- Name: the name of the division or department shown in options and reports.
- Outer ID / ID 2: a code in another system, used when exporting data.
- Is division: the record is a top-level division that departments can be placed under. When you tick it, the record’s higher division is removed.
- Division: the higher division the department belongs to. A record cannot be its own division; if you try, an error message is shown.
How to link worktypes to a division
- Save the division. Until then, the “Worktypes” tab shows the message “Please save main data to continue”.
- Open the “Worktypes” tab. The “Relations” block lists all worktypes with checkboxes.
- Tick this division’s work and press “Save”.
Linked worktypes are shown first in the options. You can change the same link on the worktype form on the “Departments” tab, see Worktypes.
How to archive or delete a division
- The edit window has no “Archived” checkbox. To archive, tick the rows in the table and use “Archived” in “Bulk edit parameters”. An archived division is no longer in the options but stays with earlier data.
- To delete, press “Delete” in the edit window or the bin button on the row. Deleting removes the division from all workers, machines, workobjects, customers, sub-departments, work, plans, worktypes and schedule entries. If the division has already been used, it is usually better to archive it.
Where divisions are used
- On the worker’s card, the “Division / department” is selected and applies from the date of the change, see Workers.
- A division can also be set on the machine, workobject, customer, project and shift forms.
- On many pages (e.g. Detail view) you can filter work and workers by division.
- If a user belongs to a division (ticked “Is division”) or one of its departments, Terake shows them in options and in many lists only the workers, machines, workobjects, worktypes and customers of that division and its departments, plus records with no division set. This way a larger company can split work between divisions.
Who can see and change it
The page is in the Admin menu and opens only for the “Administrator” role, who can add, change and delete the company’s divisions. No other role gives a separate right to add or change divisions. If “Users have by default create privilege” is ticked in the company settings, other users, except “Observer” and “ARIB employee”, can also add a new record with the plus button next to the “Division / department” selection field on forms on other pages and change a record they added within 48 hours of adding it.
Tips
- When loading from a file, the “Name” is mandatory; you can also load “Outer ID / ID 2”. Set the link between division and department on the form after loading.
- You can move several workers to a division at once on the Workers page with “Bulk edit parameters”.
API calls on this page
For integrations and AI assistants: this page uses the following Terake API calls. The full description is in the API reference.
When the page opens:
GET /api/departments– Department collection
Adding, changing and deleting (from the API description):
DELETE /api/departments/{id}– Delete Department by ID or UUIDPOST /api/departments– Create new DepartmentPUT /api/departments/{id}– Modifies DepartmentPUT /api/departments/{id}/setworkers– Assigns the Department to the listed Workers
Other calls from this screen’s dialogs and actions (from the web client’s code):
GET /api/departments/{id}– Department by ID or UUID