The maintenance module page “Machines and equipment” is the same list of machines as in the ADMIN menu. The maintenance module can be used only for the machines and equipment registered here. This page describes the machine data that concern maintenance; all the fields are described on the page Machines and equipment (ADMIN).
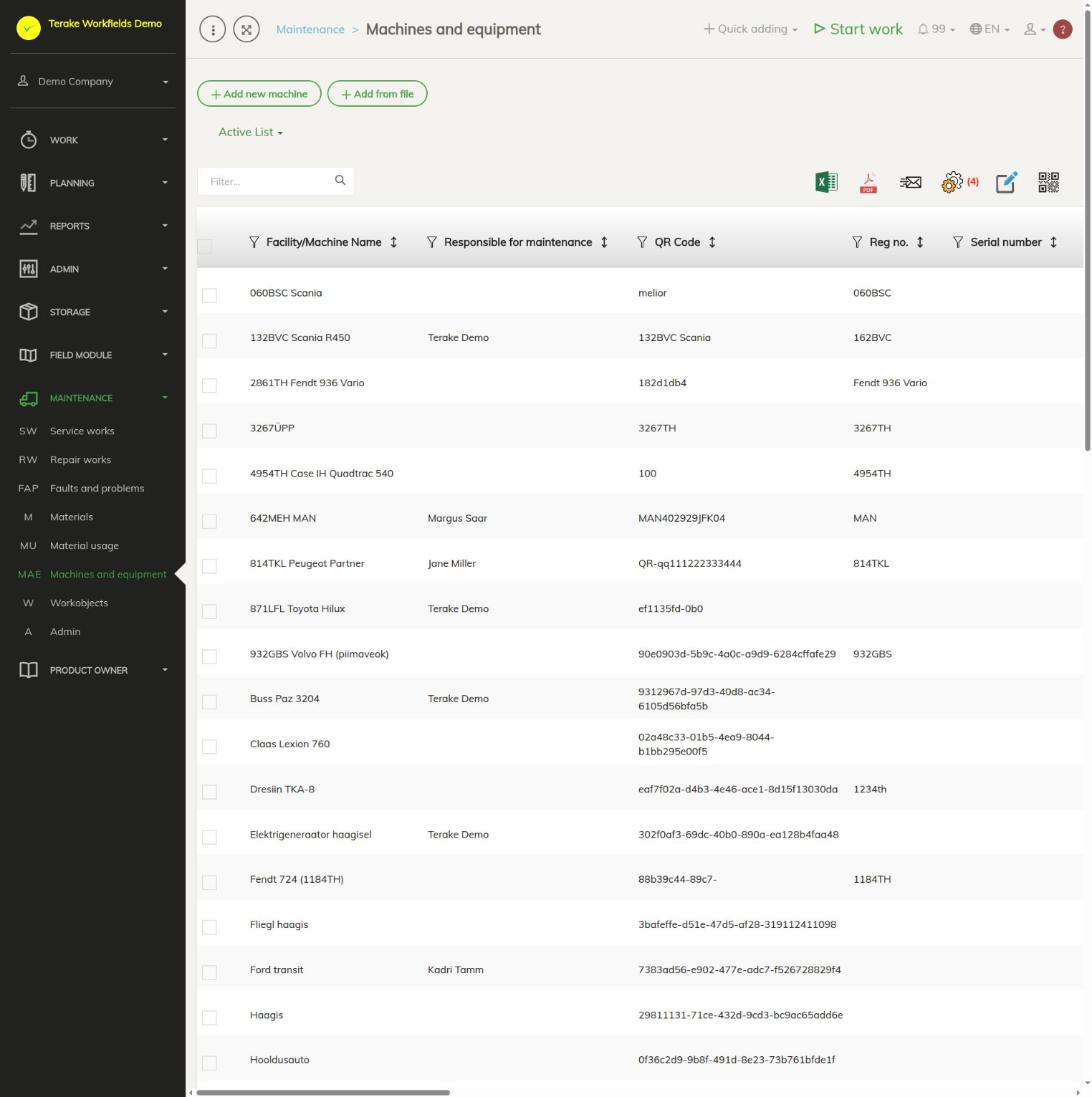
Page layout
- The button “Add new machine” opens the window for a new machine, “Add from file” imports machines from a file. The choice “Active list” shows the machines in use; archived machines can be chosen in the same place.
- Columns that matter for maintenance: “Facility/Machine Name”, “Responsible for maintenance”, “Responsible person” and “Faults” (an icon for the highest severity of the open faults).
- Row colour: red if the machine has an open “Important” or “Critical” fault or the lifespan of one of its parts has ended; yellow if the machine has an “Informative” fault or the warning value of one of its parts has been passed. An overdue maintenance does not colour the machine’s row; you see that on the page Service works.
- The machine window opens when you click the machine’s row in the list.
Maintenance data on the “Main data” tab
- “Responsible for maintenance”: organises keeping the machine in order and its maintenance. This person gets the notifications about upcoming maintenance and the machine’s faults, the tasks for the machine’s maintenance and faults are created for them, and they become the responsible person of a new maintenance when it is planned from the machine window. The list of machines makes it easy to check that every machine has someone responsible for maintenance.
- “Responsible person”: is responsible for the machine administratively (the machine’s papers, insurance, roadworthiness test, handing out and stocktaking). This person also gets the notifications about maintenance and faults.
- “Maintenance schedules and checklist”: the machine’s maintenance schedule. It is filled in automatically when a new maintenance is planned for the machine. Schedules are described on the page Maintenance ADMIN; if the schedule does not exist yet, you can set it for the machine later.
The “Maintenance” tab
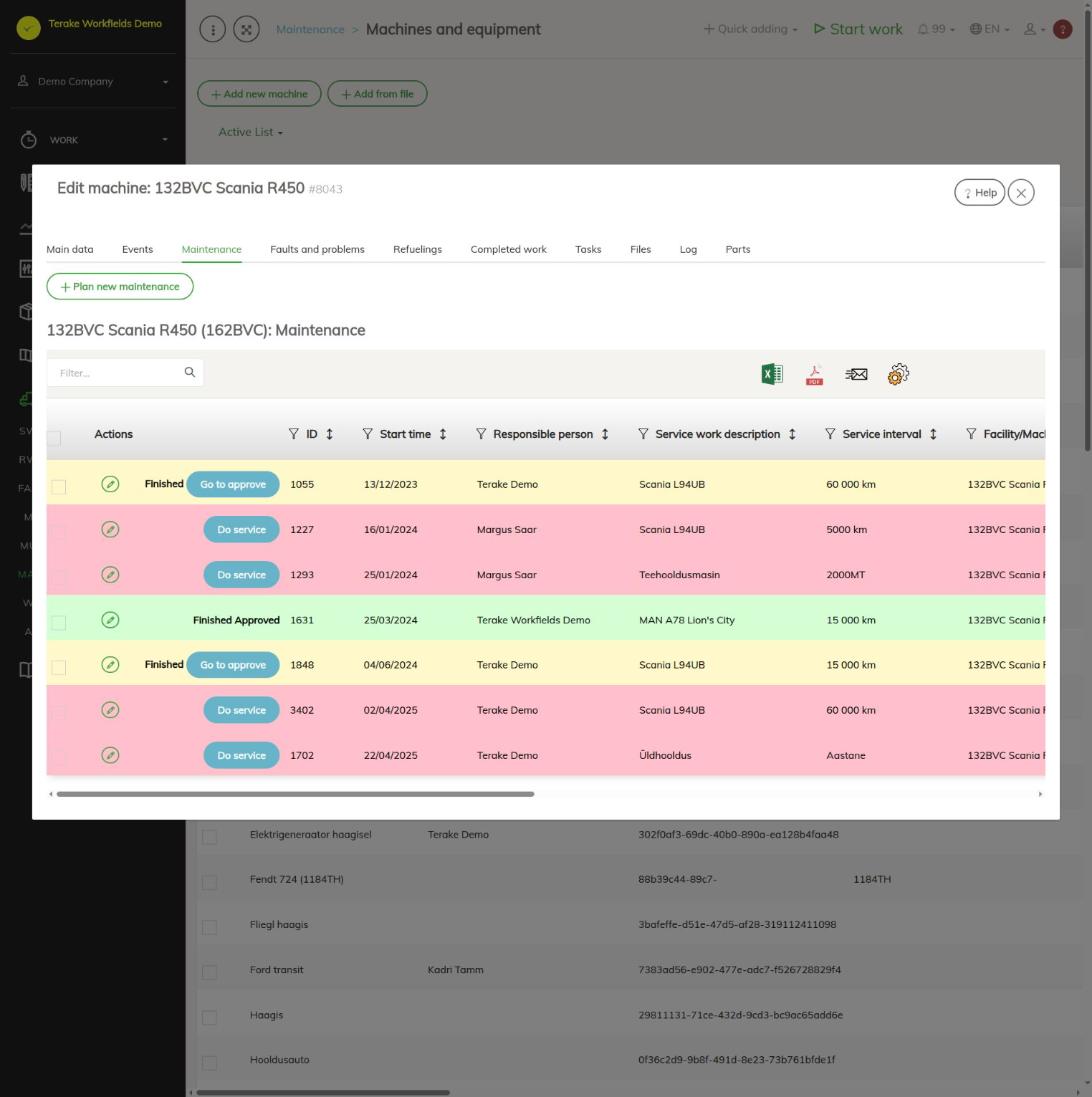
The tab lists all of the machine’s maintenance with the same colours and buttons as the page Service works. The button “Plan new maintenance” opens a new maintenance with the machine, the maintenance schedule and the responsible person (the person responsible for the machine’s maintenance) already filled in. The machine’s faults are on the “Faults and problems” tab.
The “Parts” tab: lifespan of wear parts
A part of a machine is a wear part with a set lifespan or measurable wear, for example engine oil (lifespan in kilometres and days) or brake discs (thickness in millimetres). The tab shows the machine’s last known odometer and engine hours reading and a block for each part.
- Press “Add” and fill in the part’s data:
- “Name”: a general name for the part, for example “engine oil” or “front brake discs”;
- “Serial number”, if it matters;
- “Replace Task”: the maintenance schedule task that replaces the part. When this task is in a maintenance, the part’s material and amount are added to the maintenance, and the part’s lifespan starts again when it is replaced;
- “Check or measure task”: the task during which the part’s wear is measured by hand (for example the thickness of a brake disc). Kilometres, engine hours and days do not need to be measured, they are counted automatically;
- “Spare part”: the specific material, for example the brand of oil put in the engine. The material type must be “Spare part” (see Materials);
- “Amount”: the amount replaced at a time in the material’s units, for example 4.7 litres of oil or 2 brake discs;
- “Additional”: other important information.
- Press “Save and close”. You can change the data later with the “Settings” button.
- To enter the initial lifespan values, press “Replace”. The window offers the “Initial value”, “Warning value” and “Lifespan end” from the spare part’s lifespan; for kilometres and engine hours they are already increased by the machine’s last reading. If the known values are different, change them. Alternatively, leave the part without initial values and plan a maintenance in which the part is replaced.
The part’s table shows for each lifespan measure the “Initial value”, “Warning value”, “Lifespan end”, “Current value” and “Wear %”; “Health” shows the part’s condition (“Normal”, “Informative” or “Critical”). For a part measured by hand, enter a new measurement with the “Check” button; see earlier measurements with the “Historical values” button. When the warning value is passed, a notification is sent to the person responsible for the machine’s maintenance, the responsible person and employees with the role “Dispatcher”.
Who can see and change it
- The page is in the “Maintenance” menu, which is shown to employees with the role “Vehicle service”.
- The button “Plan new maintenance” is shown only to employees with the role “Vehicle service”.
- Only your own company’s machines can be changed.
API calls on this page
For integrations and AI assistants: this page uses the following Terake API calls. The full description is in the API reference.
When the page opens:
GET /api/facilities– All Facilities list
Adding, changing and deleting (from the API description):
DELETE /api/facilities/{id}– Delete FacilityPOST /api/facilities/{id}/files– Add new file to parent objectPOST /api/facilities– Create FacilityPOST /api/facilities/{parent_id}/part– Creates or modifies a Facility Part.PUT /api/facilities/{id}– Modify FacilityPUT /api/facilities/{id}/togglearchive– Toggle Archive/Un-archive Facility
Other calls from this screen’s dialogs and actions (from the web client’s code):
DELETE /api/calendarevents/{id}– Deletes a calendar eventGET /api/facilities/enginehours-log/{id}– Facility engine hours and kilometers history from manual entryGET /api/facilities/{id}– Get FacilityGET /api/facilities/{id}/files– List all files related with parent objectGET /api/facilities/telemetry-log/{id}– Facility engine hours and kilometers history from telemetry data logGET /api/facilities/{parent_id}/part/{id}/measure_history– Facility Part check historyGET /api/facilities/{parent_id}/part– Facility Parts collectionGET /api/facilities/{parent_id}/part-with-history– Facility Parts collection with measurement historyGET /api/faults/facility/{faultitem_consumer_id}– Faultitem collection of one facilityGET /api/fuelfillings/{id}– FuelFilling by ID or UUIDGET /api/fuelfillings/facility/{facility_id}– Fuel fillings recorded against one facility.GET /api/inspection-tasks-by-facility/{facility_id}– All inspection tasks available for FacilityGET /api/inspections/facility/{consumer_id}– InspectionCase collection of one facilityGET /api/inspections– InspectionCase collectionGET /api/inventorylog/{id}– Get Facility Inventory LogGET /api/pre-usage-check/facility/{consumer_id}– Pre-usage checks of one facilityGET /api/relations/{object_type}/{object_id}– Returns the objects related to one Terake objectGET /api/integration-partner-data/{terake_object_code}/{object_id}– Integration partner id's related to objectPOST /api/calendarevents/{id}– Creates or modifies a calendar event attached to a parent objectPOST /api/facilities/integration– Registers a Facility reported by the integration serverPOST /api/facilities/log-mapping-event– Records a facility-mapping event sent by the integration serverPOST /api/inventory_facility/{facility_id}/{event_name}– Change Inventory status by registering eventPUT /api/facilities/{parent_id}/check/{id}– Measure Facility Part